
By Jacqueline Beatty
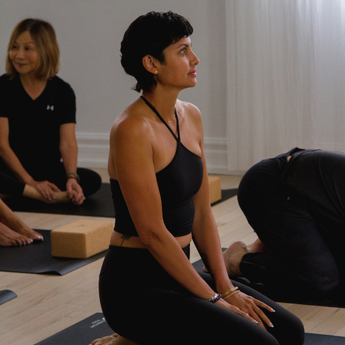 When I got certified in Pilates in 2011, I didn’t know how much movement would shape my life. Over the last years, movement has looked different depending on the stage of my life and what I needed at the time.
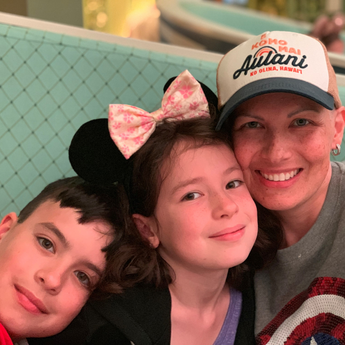
When I was diagnosed with breast cancer in 2025, I immediately feared I wouldn’t be able to do the things I loved when it came to movement and fitness.
Fitness looked different depending on the treatment I was going through, but there was one style I found most accessible: Pilates. It’s a practice I fell in love with in 2011, stepped away from for a few years, and reintroduced just before my diagnosis.
What I discovered with Pilates was its adaptability. I could adjust the movements depending on how I was feeling. During surgeries, I could focus on lower-body exercises to stay active without impacting healing areas. During chemotherapy, on days when getting out of bed felt impossible, I would commit to just 5–10 minutes. Even that small amount of movement helped with nausea, fatigue, and my mental well-being; and over time, I was able to build from there.
As I shared in my previous blog on supporting my whole self during cancer treatment, I feel incredibly grateful that I understood my body and my practice well enough to adjust it based on what I needed, knowing when to push and when to rest.
When I discovered the Pink Ribbon Program; a Pilates-based program designed specifically for breast cancer patients; I knew I wanted to get certified so I could give back to this community. Movement supported me in so many ways, and research continues to show how it positively impacts physical, mental, and emotional well-being before, during, and after cancer.
Navigating the healthcare system can be challenging, and I know I wasn’t given much guidance on how to safely reintroduce movement or manage mobility limitations. That’s why I’m so passionate about supporting others who are going through, or have gone through this journey.
The research tells us:
- Regular exercise can reduce fatigue during treatment.
- Exercise improves:
- Muscle strength and joint flexibility
- Cardiovascular health and bone protection
- Mood and symptoms of depression
- Weight management is important, as some research has linked weight gain after a diagnosis with a higher risk of recurrence.
Pilates-specific evidence:
- Improves:
- Shoulder mobility
- Muscle strength
- Pain reduction
- Overall physical well-being
- One study showed:
- ~61% improvement in functional scores
- Significant decrease in pain
- Improved quality of life after structured sessions
The research supports what I experienced during my cancer journey and continues to be a key part of my survivorship, helping me feel strong and live a full and meaningful life.
The original Pink Ribbon Program consists of four phases over six weeks and was created by Doreen Puglisi, MS, a former college professor, Pilates instructor, and cancer survivor.
Today, I’m sharing two exercises from each phase as an introduction to the program. Each exercise includes a demonstration and guidance, along with modifications to support different stages of recovery.
I’m incredibly excited to bring this movement to the breast cancer community. As always, please consult your medical team before beginning any exercise program.
Phase 1: Range of Motion & Stabilization
Exercise: Reach for the Sky
Starting Position:
Find a comfortable position lying on your back with your knees bent and feet resting on the floor. Let your arms relax by your sides.
Movement:
- Inhale: Slowly lift your arms up toward the ceiling, reaching gently with your fingertips.
- Exhale: Continue reaching your arms overhead, only going as far as feels good and comfortable for your body.
- Inhale: Pause here and take a breath.
- Exhale: Gently bring your arms back down to your sides.
Repeat: 3-4 times, moving slowly and with control.
Helpful Reminders:
-
Move within a pain-free range. There’s no need to push or force the movement.
-
Keep your ribcage soft and relaxed.
-
Allow your upper back to stay supported by the mat.
-
Keep your chest open and collarbones wide.
Modification:
If you’ve had a latissimus dorsi (LD) flap procedure, try one arm at a time and move at your own pace.
Focus:
This movement is about creating gentle mobility through the shoulders while supporting stability in the upper back. Stay connected to your breath and move in a way that feels supportive for you.
Exercise: Supine Puppet
Starting Position:
Lie comfortably on your back with your knees bent and feet grounded. Bring your arms out to the sides in a “T” position, just below shoulder height. Bend your elbows to about 90 degrees so your fingertips are pointing up toward the ceiling.
Movement:
-
Inhale: Settle into your starting position.
-
Exhale: Keeping your elbows and upper arms gently connected to the floor, rotate your right arm inward so your hand moves down toward the floor and your palm faces down. At the same time, rotate your left arm outward so your hand moves back and your palm turns up toward the ceiling. Move only as far as feels comfortable.
-
Inhale: Gently return both arms to the starting position.
-
Exhale: Reverse the movement, switching sides.
Repeat: 3–4 times, moving slowly and with control.
Helpful Reminders:
-
Stay within a comfortable, pain-free range; your hands do not need to reach the floor.
-
Keep your shoulders relaxed and supported.
-
Allow your elbows to stay slightly lower than your shoulders.
-
Move gently and evenly on both sides.
Focus:
This movement supports gentle rotation through the shoulders while maintaining stability through the shoulder blades. Stay connected to your breath and move in a way that feels supportive for your body.
Phase 2: Spinal Mobilization & Core Stability
Exercise: Mermaid Stretch
Starting Position:
Sit comfortably on your right hip with both legs folded to the left. Place your right hand on the floor beside you for gentle support. Let your left arm rest by your side to start.
Movement:
- Inhale: Reach your left arm up toward the ceiling, keeping your shoulder relaxed and away from your ear. Think about growing tall through your spine.
- Exhale: Begin to gently arc your body over to the right, creating a lengthening stretch through the left side of your body. Move slowly and only as far as feels comfortable.
- Inhale: Pause and breathe into the stretch, finding space through the side body.
- Exhale: Press gently through your supporting hand to return to an upright position.
Repeat: 3-4 times, then switch sides.
Helpful Reminders:
-
Keep your hips grounded, especially the opposite hip from the stretch.
-
Think about length first, then side bend; avoid collapsing into the movement.
-
Keep your ribcage soft and avoid letting it push forward.
-
Your supporting hand can move slightly farther away or bend at the elbow to adjust intensity.
-
Let your shoulders stay relaxed and your shoulder blades gently settled on your back.
-
Allow your head to follow naturally as an extension of your spine.
Focus:
This stretch is about creating length and space through the side of the body while maintaining support and stability through the shoulders and spine. Move with ease and breathe into the areas that feel tight or restricted.
Exercise: Inner Peace Stretch
Starting Position:
Sit comfortably with your spine tall. Bring your arms in front of your body, palms gently pressing together, and allow your elbows to relax out to the sides.
Movement:
-
Inhale: Keeping your palms connected, slowly lift your arms upward, moving only as high as feels comfortable for your body.
-
Exhale: Gently lower your arms back down to the starting position, maintaining light contact between your palms.
Repeat: 3-4 times, moving slowly and with control.
Helpful Reminders:
-
Keep your shoulders relaxed and away from your ears.
-
Maintain a soft connection between your palms without forcing them together.
-
Sit tall through your spine and stay gently engaged through your core.
-
There is no need to push into discomfort—move within a range that feels supportive.
Focus:
This movement supports gentle shoulder mobility while encouraging stability through the shoulder blades and core.
Modification:
This exercise can also be performed seated in a chair for added support.
Phase 3: Spinal Mobilization & Core Stability
Exercise: Toe Taps
Starting Position:
Lie comfortably on your back with your knees bent, feet on the floor, and arms resting by your sides. Imprint your spine by gently pressing your lower back against the mat.
Movement:
-
Inhale: Prepare and connect to your breath.
-
Exhale: Gently engage your core by drawing your hip bones toward your ribcage, allowing your lower back to feel supported against the mat.
-
Inhale: Lift one leg up into a tabletop position (knee stacked over hip, forming a 90-degree angle).
-
Exhale: Engage through your abdominals and bring the second leg into tabletop.
-
Inhale: Hold and stay steady.
-
Exhale: Slowly lower one foot toward the floor, lightly tapping your toes down while maintaining control and keeping the shape of your leg.
-
Inhale: Return the leg back to tabletop.
-
Exhale: Repeat on the other side.
Repeat: Alternate 5-6 times each side, moving slowly and with control.
Helpful Reminders:
-
Keep your core gently engaged to support your lower back.
-
Place your thumbs on your ribs and fingers on your hips; try to keep this connection steady without letting them move apart.
-
Move within a range that feels controlled and pain-free.
-
Keep your shoulders relaxed and your upper body quiet.
Modification:
If you have had a TRAM flap procedure, you may have difficulty stabilizing in a tabletop position. Keep one foot grounded on the floor at all times.
Exercise: Hip Lift
Starting Position:
Lie comfortably on your back with your knees bent, feet grounded, and arms resting by your sides with palms facing down. Find a neutral spine.
Movement:
-
Inhale: Prepare and connect to your breath.
-
Exhale: Gently engage your core and lift your hips a few inches off the mat, creating a straight line from your ribcage to your knees. Think about lengthening through the front of your body rather than lifting high.
-
Inhale: Pause briefly at the top, holding for 1–2 seconds.
-
Exhale: Slowly lower your hips back down with control, keeping your spine neutral as you return to the mat.
Repeat: 3-4 times, moving slowly and with control.
Helpful Reminders:
-
Keep your movement small and controlled—this is about connection, not height.
-
Imagine your torso (from ribs to hips) moving as one piece, like it’s supported in a tube.
-
Keep your core gently engaged throughout the movement.
-
Avoid arching your back as you lift or lower.
-
Keep your shoulders relaxed and grounded.
Focus:
This movement strengthens the hips and glutes while maintaining core stability and spinal alignment.
Visualization:
Imagine someone gently lifting you from your belt line, creating length through your body as you rise.
Remember: Movement is not about doing more, it’s about doing what’s possible, with intention, and reconnecting to your body one step at a time.
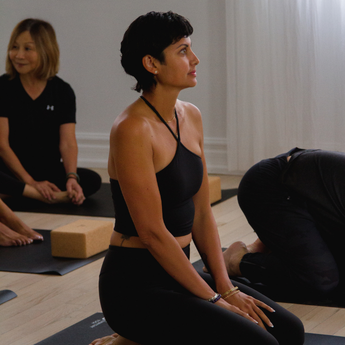
A special thank you to Glow Movement Studio in Ajax for generously gifting the studio space to film these Pink Ribbon Program® videos. Your support helped bring this important movement resource to life, and I’m incredibly grateful for your generosity and commitment to the community.
The full Pink Ribbon Program® exercise series is coming soon to my YouTube channel.
Follow me on Instagram for the official launch date and updates.
Move. Rebuild. Reconnect. Rise.

 Receive updates by email


